How to set up a carddav server on Windows 10/11?
In this year of 2020, more and more jobs require people to work from home due to COVID-19 pandamic. Syncing calendar, contact and task remotely from home in order to cope with colleagues has become an issue for those who have not done this before.
Many people want to host their own
address book server for various reasons, for example, higher security, there are several address book (
CardDAV) servers and calendar (CalDAV) server software programs are lying around, such as OwnCloud for Linux and Mac OS X server for Apple computers and etc. However, what is our choice if we want to setup one on Windows PC? Among all paid or
free mail server software, I recommend one that takes a breeze to install:
EVO Mail Server.
How to set up a caldav server on Windows Server?
There are only a few steps before you can get the CardDAV/
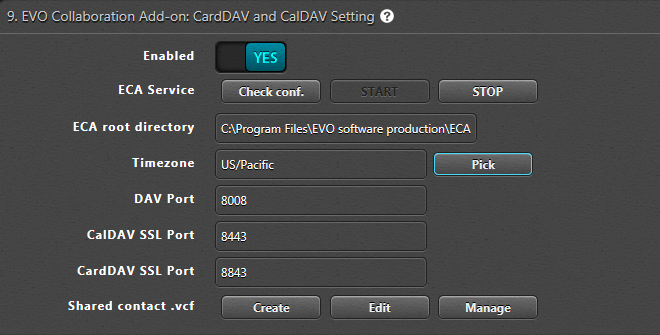
CalDAV server up and running: 1. Open port of
8008,
8443 (for SSL), and
8843 (for SSL) in network firewall or router If such a device does exist and you want it accessible across Internet. 2. Download EVO Mail Server from
EVO Official Site and Install it. 3. At the
Server setting status of
Status page of EVO Mail Server, click on the
looping circular arrows to the right-hand side of
Windows Firewall to open CardDAV/CalDAV ports in
Step 1.

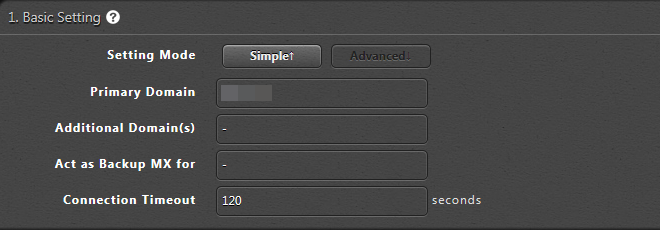
4. Enter domain name in
Primary domain within
Settings page of EVO Mail Server GUI, if you own an Internet domain name and want EVO to generate proper SSL certificate for that. Otherwise, your server internal IP or public IP can do it.

5. On the same
Settings page, go to
9. EVO Collaboration Add-on: CardDAV and CalDAV Setting and click
Enabled to
YES.

6. Click
Check conf. to the right of
ECA Service and click on
START to start the service. Then, a window will pop up informing you that the service is running. Note: you may be prompted to download
MS VC++ 2008 runtime and
ECA (EVO Collaboration Add-on) in this step. 7. Final step, sign your certificate with certificate authorities such as
k-software or
comodo, that will help clients to negotiate with server without a warning. Now, you may use any CardDAV/
CalDAV synchronizer enabled clients such as
EVO Collaborator for Outlook, iPhone/iPad devices, Apple iCal, Thunderbird’s Lightning add-on, and etc to access CardDAV/CalDAV resources.


